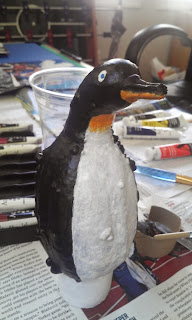
When life gives you lemons, you make lemonade, right? But when life gave me a funky looking squash, I made a penguin. Just me or...? I made this because I wanted to make something unique for a teacher of mine for Halloween, and she loves penguins. I thought it would make a nice gift or a cute fall decoration, so on the blog it goes! Also, making it was quite fun. I never would have thought I'd be painting a squash at some point in my life.
Let's get to it! First, get a squash that resembles a penguin as much as possible. This could very well be the hardest part. I got mine from the local Harris Teeter, and wow, so many to choose from! There were some really strange ones...
but I was lucky enough to find this little guy:
After you've picked your squash, get some acrylic paint in the following colors: black, white, red, yellow, and blue (for the eyes). If you have orange, you don't need red and yellow, I didn't have it, so I just mixed the red and yellow paint to make orange. But if you want to make your penguin different colors, go for it! Then get your other paint supplies, like brushes, a cup of water to clean the brushes, and something you can organize your paint on. You'll also need some kind of glue (I used superglue), scissors, and a toilet paper roll for the feet and the stand.
Alright, now time to paint! I held the head while I painted the rest of the body and waited for the body to dry. Make sure to cover all those lumps 'n bumps! By the time you finish this, your squash will look pretty suited up.
After the paint dries completely, hold the body gently and paint the head. Make sure the paint dries on the head before adding the eyes. This goes for any new layer of paint.
While it's drying, you can make the stand. I cut the toilet paper in half to make two mini-toilet paper rolls. I took one of the rolls and cut it to a size that I liked, then painted the outside white. I painted a messy line of blue at the bottom so the stand would look like ice on the water. After the paint dried, I cut slits all along one side of the roll and folded them in. This is important! If you don't do this, the edge of the roll is too sharp and might cut into the paint (trust me, that actually happened before I came up with this).
Now for the feet! Use what's left of the toilet paper roll and cut out two feet. Then paint the feet, let them dry, and superglue them to the bottom of the squash. I've never been good with superglue, so of course I got it on my hands. Not exactly the most pleasant feeling. If you want, you can cut and paint wings and glue them to the sides of the penguin. I didn't because I was pretty much done with superglue at this point. Once the glue dries (so much drying involved in this), you can plop your penguin on its stand.
And now you're finished! Say hello to your little penguin creation.


